Hello world! As I type my post today, this is what is currently on the printer.
I don't have to tell you what it is, do I? ↓
Yes, of course! You got it! The Colosseum!
As the old adage goes, "Rome wasn't built in a day". Well, let me tell you a little something about 3D printing. You must...have...patience.
Depending on the size and settings of your file, it could take anywhere from a few minutes to days for something to print. This current print of the Colosseum? It started last night at around 7:15 and it's only now at 34%. Jason said it should take a day and a half. 😲 So much for that production line I was envisioning.
And to add more adventure to this world of 3D printing I find myself in, this is how it usually goes after something is sent to print, which is usually when I am not around:
Me: What are ya printing?
Jason: I don't know.
Me: OMG.
Jason: {smirks and shows those dimples}
Me: Did you design it yourself?
Jason: No.
Me: Have I seen this on Thingiverse?
Jason: I don't know.
Me: Is it something I asked you to print?
Jason: Maybe.
Me: {Looking at what is printed so far and trying to guess from the shape and size}
Me: Is it a figurine or something gadgety?
Jason: I don't know.
Me: Will you just tell me?!
Jason: You'll see. {more smirks and dimples}
Me: OMG.
The boy doesn't budge.
So, last night I went to bed not knowing what this thing was going to be. This morning when I saw the first slight nubbies cropping up, I went to Jason with my guess, and all I got was another smirk. Although, this time it was meant as confirmation that I was correct! The Colosseum it is!
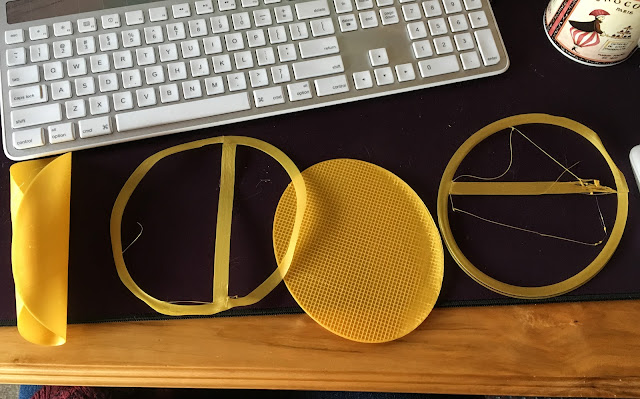
The thing is, he'd been trying to get this print started for the past few days but was having problems with the filament. The print bed is heated, and you want the softened filament to stick to it firmly before it starts to dry, which is not what it was doing. It was curling up and making messes.
Here are the first 4 attempts to get this thing started. That burrito on the left was Jason's doing. I don't know what originally went wrong with it. ↓
So, as you can see, I went a lot longer than one night trying to figure out what he was printing, and then getting nothing but a lot of "I don't know" and smirks. I guess I better get used to it, because I know more of it is coming.
In the meantime, here are a few more prints he's made. ↓
The swan was the first or second print he made. It was
another sample file (oops. It came from this
file by
Thingiverse.com user,
loubie), and it came out wonky, with it's head hanging by a thread, and then I broke it's poor little wing. I used a glue stick to glue the wing and head back on, and that bloody looking ring around it's neck is nail polish. I was just trying it out as a glue because it happened to be sitting there. ha. The little boat is called a "Benchy" for "benchmark", and it's a file that you print to test and calibrate your 3D printer. I don't really have to paint these two, but I'd like to at some point.
One of the main reason's Jason wanted a 3D printer (besides TARDISes and other space ships) was to make buildings for our Dickens Village. He found that on
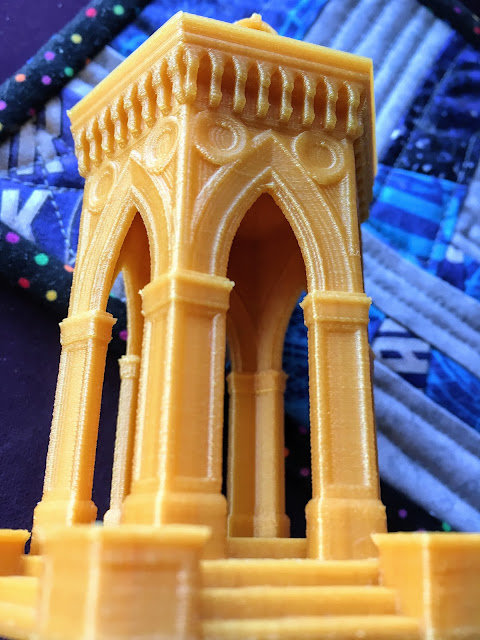
Thingiverse, there are a lot of people that design buildings, accessories, and figurines for wargaming, and that is where Jason found this next print file, a stone gazebo. ↓
I flipped when I saw this print. It came out so well with such sharp detail, and really, it's a tiny gazebo! How could you not love it? It's even got detail on the inside arches, if you can see it in the photo below. ↓
I can see it now. "Jason, want to go on a trip to see all of these places in person? We could take a picture of our prints next to the real thing!" It could happen. 😏
And last for today is a sweet little British victorian post box for our Dickens Village, designed by the same Thingiverse user that designed the stone gazebo. ↓
Is that cute or is that cute? I'm not sure how tall it is. I think less than 2 inches? I can't remember if he'd shown this file to me before he printed it or not, but I was so surprised to see it printed, painted, and fitting right into my village when I came home from work, I think the day after Christmas.
Right after that, Jason turned the painting duties over to me, even though I thought he did a wonderful job. But he said emphatically, "Oh no, it's too stressful". ha. So, I have my work cut out for me. These all should be fun to paint...soon (which is what I keep telling him).
🗿
Thanks for visiting!
