Showing posts with label 3D design. Show all posts

Saturday, December 29, 2018

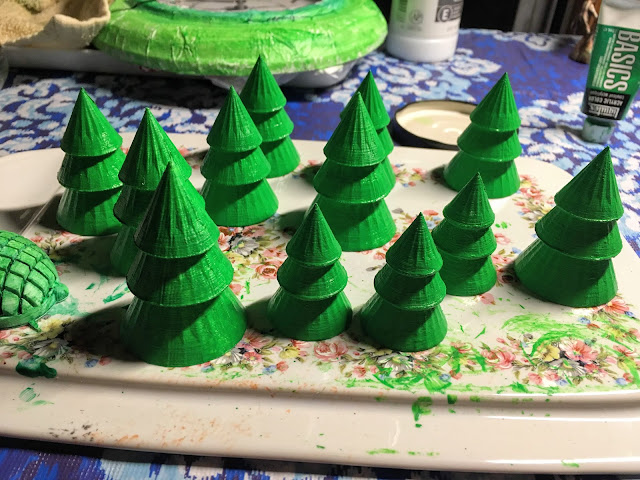
3D Designed and Printed Snowman and Snow Topped Trees

JC designed and printed these trees and snowmen for our family members for Christmas.  
I painted them with acrylic paints. 

3D designed and printed snowman and snow topped trees via foobella.blogspot.com

3D designed and printed snowman and snow topped trees via foobella.blogspot.com
The snowmen are what we like to call "interactive" because he included holes for arms that they can insert twigs into, or even toothpicks, if they wish.  

3D designed and printed snowman and snow topped trees via foobella.blogspot.com

3D designed and printed snowman and snow topped trees via foobella.blogspot.com

3D designed and printed snowman and snow topped trees via foobella.blogspot.com

3D Designed and Printed Snowman and Snow topped Trees

3D designed and printed snowman and snow topped trees via foobella.blogspot.com

They each received one snowman and two snow topped trees.  They are so cute. 
I forgot to have him print a set just for us!

I hope you had a Happy Christmas, and here's to a peaceful New Year. 


Thanks for visiting. 

Saturday, November 3, 2018

3D Printed Garden Urns, Water Feature, Dalek, and Much More.

I am thrilled with these garden urns that JC designed and printed. We were sitting around brainstorming accessories that he could print for our Dickens Christmas Village one day.  
Garden urns was one of my requests. I think that got his creative juices flowing. 
I LOVE them!  They are just what I envisioned. 

3D Printed Garden Urns via foobella.blogspot.com


Here they are after painting with acrylic paint. 

3D Printed Garden Urns via foobella.blogspot.com

They go great with this fountain he printed from a design found at Thingiverse.com.

3D Printed Garden Urns and Fountain via foobella.blogspot.com

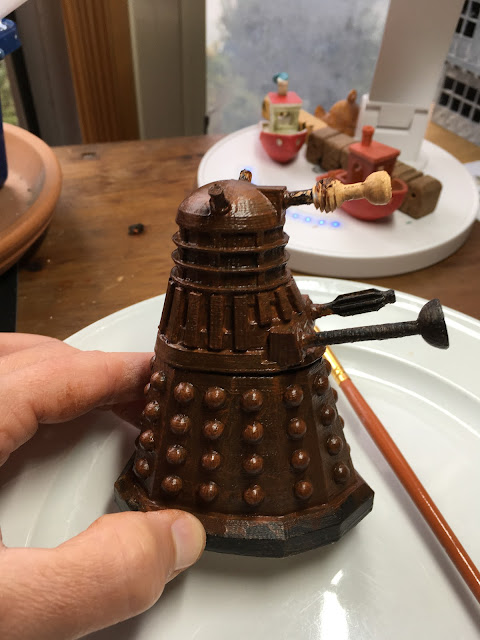
Here is the Dalek in progress.

3D Printed Dalek via foobella.blogspot.com

I had to look up what mixture of paint colors to use to make the bronzy color. (burnt sienna and cadmium red light with more burnt sienna). 

3D Printed Dalek via foobella.blogspot.com

Here is what he's supposed to look like and hopefully will at some point.  
It looks a bit dark in the above picture, but that's just the lighting. 

Dalek


Here is Mister Dalek with some other items in progress; British Post Box and dogs, and cat. 

3D Printed Dalek, dogs, cat, and British Post Box via foobella.blogspot.com

And then there is this lil' lady. 

Raiders of the Lost Ark Fertility Idol via foobella.blogspot.com

Raiders of the Lost Ark Fertility Idol via foobella.blogspot.com

Raiders of the Lost Ark Fertility Idol via foobella.blogspot.com

If you don't know her right off the bat, don't worry, I wouldn't have either. 
 Though, I probably have seen her hundreds of times since the early 1980s.  😉

Thank you for visiting. 
🐍

{All 3D Printing Designs found on www.Thingiverse.com except the garden urns, which were designed and printed by JC}

Thursday, October 11, 2018

3D Halloween Printing Fun!

JC has been getting into the season of Halloween. 
He's dusted off the 3D printer and given me a lot of work to do painting things. 

These are magic pumpkins, before being painted. 
3D printed pumpkins via foobella.blogspot.com

See the magic? When you put a light inside, a jackolantern face glows.
3D printed pumpkin via foobella.blogspot.com

Below is a short video of a skeleton in the process of being printed.


 Pumpkins are all painted. Now to paint the skeleton votive holder. 
3D printed pumpkins and skeleton votive via foobella.blogspot.com

3D printed votive via foobella.blogspot.com

Looking spooky!
3D printed skeleton votive via foobella.blogspot.com

Below is a skull JC printed last year, which I just got around to painting. I did it in phases, and I just told him with this last shot, that this skull is getting scarier and scarier. I think that means I'm done with him. Pretty soon I won't be able to be in the same room with it.

3D printed skull and skeleton votive via foobella.blogspot.com

I think my favorite is the coffin and mummy. 
3D printed mummy and coffin via foobella.blogspot.com

I have yet to paint them.

3D printed mummy and coffin via foobella.blogspot.com

Next to a cap for scale. I love miniatures, maybe that's why this is my favorite. 

3D printed mummy and coffin via foobella.blogspot.com

 And here is one of the above pumpkins sitting on top of a lamp to demonstrate the glowing. There was a blip in the printing process, that is why you see the line through his noggin. 
3D printed glowing pumpkin via foobella.blogspot.com

Thanks for visiting!
💀

{All the 3D printing designs were found on www.thingiverse.com}

foobella.blogspot.com


Saturday, January 14, 2017

Rome Wasn't Built In A Day: 3D Printing Takes Patience.

Hello world! As I type my post today, this is what is currently on the printer.  I don't have to tell you what it is, do I?
3D Colosseum print via foobella.blogspot.com


3D Colosseum print via foobella.blogspot.com

Yes, of course! You got it! The Colosseum!
Rome Colosseum

Colosseum digital file by Thingiverse.com user CasualJoeMama7
As the old adage goes, "Rome wasn't built in a day". Well, let me tell you a little something about 3D printing. You must...have...patience. 

Depending on the size and settings of your file, it could take anywhere from a few minutes to days for something to print. This current print of the Colosseum? It started last night at around 7:15 and it's only now at 34%. Jason said it should take a day and a half. 😲 So much for that production line I was envisioning. 

And to add more adventure to this world of 3D printing I find myself in, this is how it usually goes after something is sent to print, which is usually when I am not around: 

Me: What are ya printing? 
Jason: I don't know.
Me: OMG. 
Jason: {smirks and shows those dimples}
Me: Did you design it yourself? 
Jason: No.
Me: Have I seen this on Thingiverse? 
Jason: I don't know. 
Me: Is it something I asked you to print?
Jason: Maybe. 
Me: {Looking at what is printed so far and trying to guess from the shape and size} 
Me: Is it a figurine or something gadgety? 
Jason: I don't know. 
Me: Will you just tell me?!
Jason: You'll see. {more smirks and dimples}
Me: OMG. 

The boy doesn't budge. 

So, last night I went to bed not knowing what this thing was going to be. This morning when I saw the first slight nubbies cropping up, I went to Jason with my guess, and all I got was another smirk. Although, this time it was meant as confirmation that I was correct! The Colosseum it is!

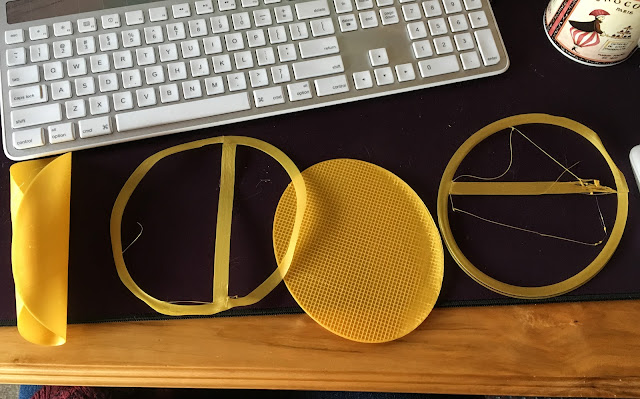
The thing is, he'd been trying to get this print started for the past few days but was having problems with the filament. The print bed is heated, and you want the softened filament to stick to it firmly before it starts to dry, which is not what it was doing. It was curling up and making messes. 

Here are the first 4 attempts to get this thing started. That burrito on the left was Jason's doing. I don't know what originally went wrong with it. ↓
3D printing misfires via foobella.blogspot.com

So, as you can see, I went a lot longer than one night trying to figure out what he was printing, and then getting nothing but a lot of "I don't know" and smirks. I guess I better get used to it, because I know more of it is coming. 

In the meantime, here are a few more prints he's made. ↓

3D printed Swan and Benchy via foobella.blogspot.com

The swan was the first or second print he made. It was another sample file (oops. It came from this file by Thingiverse.com user, loubie), and it came out wonky, with it's head hanging by a thread, and then I broke it's poor little wing. I used a glue stick to glue the wing and head back on, and that bloody looking ring around it's neck is nail polish. I was just trying it out as a glue because it happened to be sitting there. ha. The little boat is called a "Benchy" for "benchmark", and it's a file that you print to test and calibrate your 3D printer.  I don't really have to paint these two, but I'd like to at some point. 

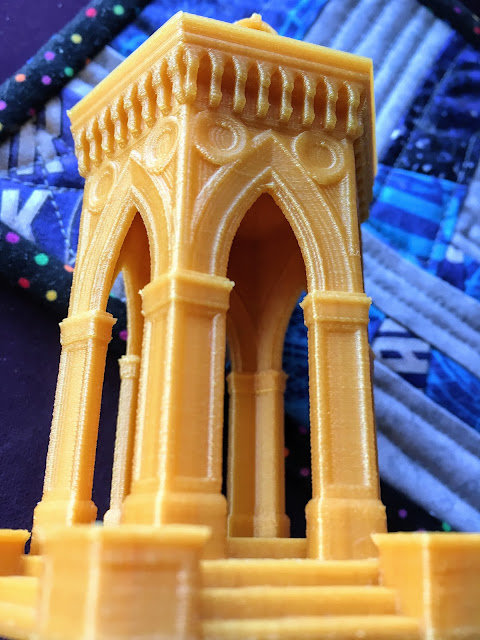
One of the main reason's Jason wanted a 3D printer (besides TARDISes and other space ships) was to make buildings for our Dickens Village. He found that on Thingiverse, there are a lot of people that design buildings, accessories, and figurines for wargaming, and that is where Jason found this next print file, a stone gazebo. ↓
3D printed stone gazebo via foobella.blogspot.com
stone gazebo digital file from Thingiverse.com user herrigold
I flipped when I saw this print. It came out so well with such sharp detail, and really, it's a tiny gazebo! How could you not love it? It's even got detail on the inside arches, if you can see it in the photo below. ↓

3D printed stone gazebo via foobella.blogspot.com
stone gazebo digital file from Thingiverse.com user herrigold
It's about 4 inches tall, and it's design is inspired by Baroness Burdett Coutts Drinking Fountain. ↓


I can see it now. "Jason, want to go on a trip to see all of these places in person? We could take a picture of our prints next to the real thing!" It could happen. 😏

And last for today is a sweet little British victorian post box for our Dickens Village, designed by the same Thingiverse user that designed the stone gazebo. ↓
British victorian post box digital file by Thingiverse.com user herrigold
Is that cute or is that cute? I'm not sure how tall it is. I think less than 2 inches? I can't remember if he'd shown this file to me before he printed it or not, but I was so surprised to see it printed, painted, and fitting right into my village when I came home from work, I think the day after Christmas.    

Right after that, Jason turned the painting duties over to me, even though I thought he did a wonderful job. But he said emphatically, "Oh no, it's too stressful". ha.  So, I have my work cut out for me. These all should be fun to paint...soon (which is what I keep telling him). 

🗿

Thanks for visiting!

Friday, January 13, 2017

Binge-Watching Doctor Who, and 3D Printing

We have been binge-watching Doctor Who. Well, more precisely, we have watched one episode every night starting sometime in October 2016. We started with the show's 2005 rebooted series and the ninth Doctor.  (From 1963 to present, there have been twelve Doctors).  If you don't watch the show, don't worry. I was very confused about it's history, too.  

Here's a very short synopsis, taken from the Doctor Who wikipedia page: 
"The programme depicts the adventures of the Doctor, a Time Lord—a spacefaring and time-travelling humanoid alien. He explores the universe in his TARDIS, a sentient time-travelling space ship. Its exterior appears as a blue British police box, which was a common sight in Britain in 1963 when the series first aired. Accompanied by companions, the Doctor combats a variety of foes, while working to save civilisations and help people in need."
I've been aware of Doctor Who since I was a kid. The show originally aired from 1963-1989, with one TV film in 1996, and then a full on series reboot starting in 2005 and continuing to the present. Before 2005, if you'd asked me to conjure an image of "the Doctor" (as he is referred) this is what would come to mind. ↓


This makes perfect sense, since this was the Doctor (played by Tom Baker) from 1974-1981, smack dab in the middle of my childhood. 

I'm pretty sure I never actually saw an episode of the show back then. I guess I was too busy with Star Trek, and maybe that's all the science fiction my little mind could handle at the time. I definitely knew of the show, though. I think in my child's mind, Doctor Who was synonymous with a local late night program Doctor Madblood, which was a mad scientist skit sandwiched between whatever horror film was being aired that night and it's commercial breaks.  You can see where I'd get that idea, right? Doctor Who? Doctor Madblood? ha. 

My next brush with Doctor Who was watching a few seasons of it's spin-off show, Torchwood, which aired from 2006-2011. I didn't even realize it had any connection to Doctor Who at the time! Silly me. Oh, and then, there was the time I stumbled on the world's most awesome TARDIS cake. It actually is "bigger on the inside"!

So, back to this summer, when we started nightly watching the Doctor Who 2005 series reboots. I don't know about you, but we like to wind down our evenings by watching TV in bed, and we had just finished binge-watching an episode of The X-Files nightly. That's 202 episodes for the last 202 nights, plus 2 feature films. After some "I want to believe" withdrawal, we had to find something else to binge on.  At first we were going to do the entire Star Trek canon, which included the original series and every one thereafter. Well, that all seemed a bit daunting. Then, Jason suggested Doctor Who, and I was totally on board. I wanted to finally unwrap this show that had been such a mystery to me as a child, and was still confusing to me as an adult, with all it's different Doctors, and this TARDIS thing that was "bigger on the inside", and vague inklings of Daleks, and weeping angels. I was IN!

As of last night, we are on our eleventh Doctor, played by Matt Smith. Don't ask me how many episodes that is... 78 to be exact, about 45 to go to be caught up on all the episodes that have aired to date since 2005. 😉 

So, what am I getting at, you ask? Well! 3D prints! What else is there to post about? 

Oh, besides the Doctor Who Lego set he got for Christmas, that is, but legos are a whooole other can of worms. ha. ↓
Lego Doctor Who TARDIS weeping angel Dalek via foobella.blogspot.com

So, now that we are huge Doctor Who fans, Jason's first print after the test prints was of course, the TARDIS (aka "Time And Relative Dimension In Space"). 

The tenth Doctor (played by David Tennant) and the TARDIS via foobella.blogspot.com
The tenth Doctor (played by David Tennant) and the TARDIS.

It came out great except for some wonky window panes. TARDIS before painting. ↓
3D printed TARDIS via foobella.blogspot.com
TARDIS digital design file via Thingiverse user 23Maple

That is my ipad mini in the background (if you are wondering about scale) which has various versions of the TARDIS in view. I was trying to get the right color blue for the current version we were watching. You can see the wonky window panes below. ↓
3D printed and painted TARDIS via foobella.blogspot.com
TARDIS digital design file via Thingiverse user 23Maple

And then, since it was Christmas, and we all know The Doctor travels through time and space in the TARDIS, what better spot for it than in the victorian era England of our Dickens Christmas Village.↓ 
3D printed and painted TARDIS via foobella.blogspot.com

Which then led to a weeping angel. Scariest episodes so far contain weeping angels, who get closer and closer to you each time you take your eyes off of them. Literally. Don't Blink!

Our first weeping angel print. ↓
3D printed and painted weeping angel via foobella.blogspot.com
weeping angel painted with acrylics. Digital design file via Thingiverse user vincentbarre.
Jason felt she was not the correct scale for the TARDIS, so printed another one, which is now, of course, creepily at home in our Dickens Village. The angel pictured below was printed with silver filament, so I didn't have to paint her. ↓
3D printed weeping angel via foobella.blogspot.com

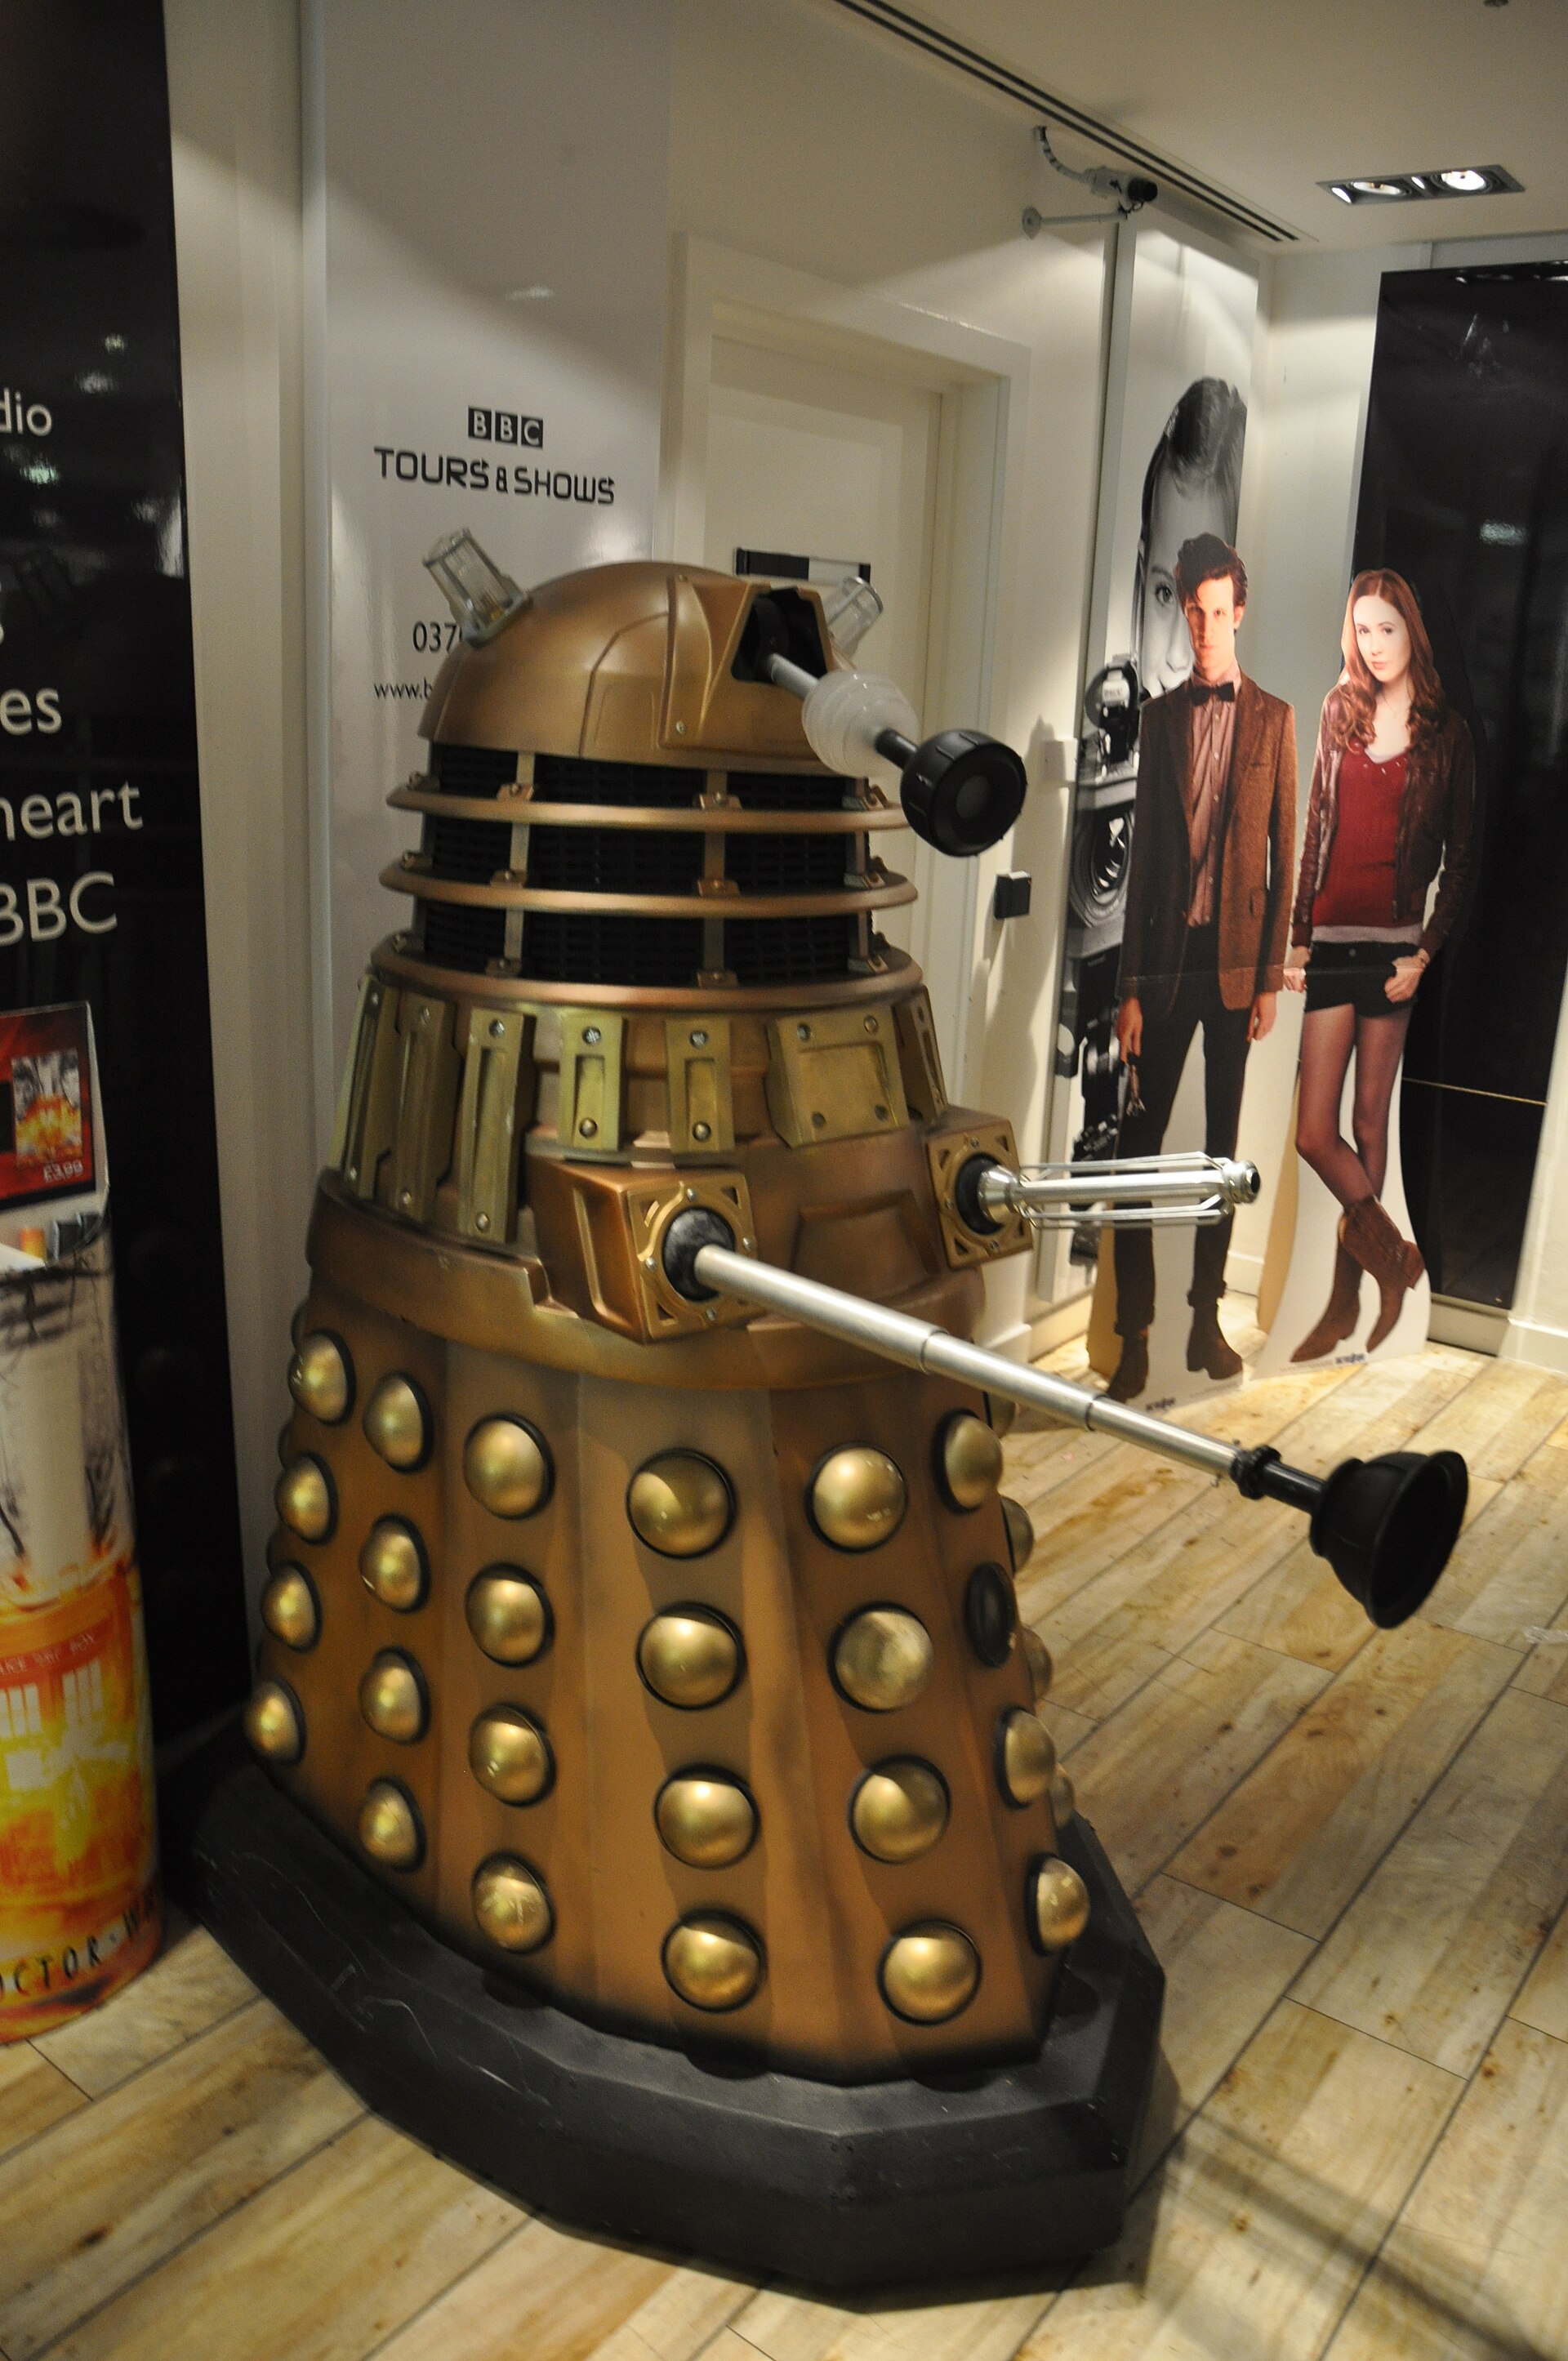
Jason wanted to print a Dalek next, but I'm resisting that idea as best I can, though I know I'm fighting a losing battle. They are my least favorite enemies of the Doctor.  I mean, they have a toilet plunger and egg beater as hands, and the worst, most grating voice ever, but I guess it could be fun to paint. ↓
Dalek via wikipedia
We'll see. Stay tuned....somewhere in time and space....

🤖

and Thanks for visiting!

Thursday, January 12, 2017

3D Printed Gadgets and Tools

I showed you a cute 3D printed camera magnet in my previous post. Today I will show you a couple things Jason made that show the utility of having a 3D printer. Although, admittedly, one print was for the 3D printer, and the 2nd was for wares made with the 3D printer. ha.

When he assembled his printer, Jason found that the spool holder--the thing that holds the filament reel atop the printer--was not wide enough, which is strange, since the filament reel I bought was suggested to go with this printer.  

No problem, though. Jason went to Thingiverse.com and found someone who designed their own spool holder. So, our first utilitarian 3D print was born. 

See the gold peeking out from the middle of the filament reel in this photo from my previous post? That's our print that came from this digital file created by Thingiverse.com member ghostpoisonface
3D printed camera via foobella.blogspot.com


Here is what a digital file looks like. ↓
3D design via www.thingiverse.com/thing:1782317 blogged on foobella.blogspot.com
image via http://www.thingiverse.com/thing:1782317

The image below shows supports attached to the object, which will be removed once the object is created. 
3D design via www.thingiverse.com/thing:1782317 blogged on foobella.blogspot.com
image via http://www.thingiverse.com/thing:1782317

Here you see a comparison between our print (gold) and the spool holder that came with the printer. Big difference.  

3D printed Spool Extender via foobella.blogspot.com


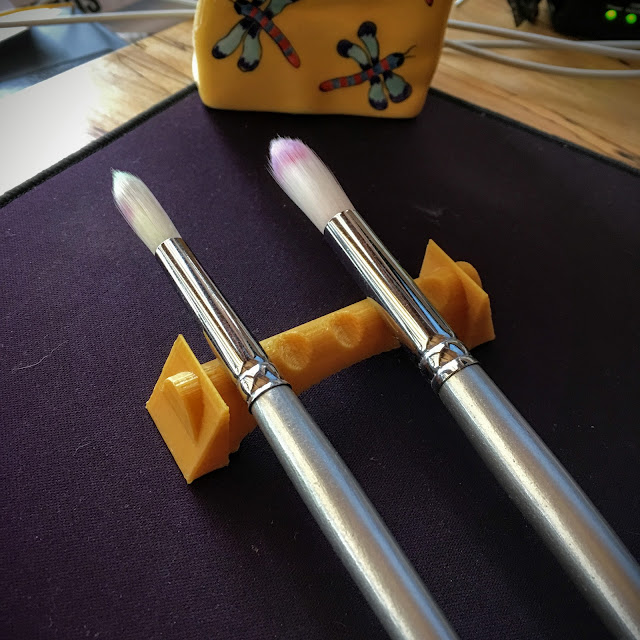
The second tool he printed also happens to be Jason's first design using the free program Tinkercad.com. Do you know what it is? ↓

3D printed Paint Brush Rest via foobella.blogspot.com

Maybe this will help. 

3D printed Paint Brush Rest via foobella.blogspot.com

After my first session painting some of his prints, I told Jason he should make a paint brush rest for me. In the blink of an eye, it seems, there it was! I love this printer!! And of course, Jason's design skillz. 😎

For anyone interested in printing a brush rest of their own, here is the link to Jason's design: 

═══════════

Oh, and because I forgot to include it in my last post, here is what was printing in my post from Monday. Though, who am I kidding? Everyone knows what this is, even if they are not Star Wars fans. ↓
3D printed Millennium Falcon via foobella.blogspot.com
Millennium Falcon printed from digital file via http://www.thingiverse.com/thing:919475

Yes, I still have to paint it. sigh. Thank goodness I have that paint brush rest. 

My mind is awhirl with printing ideas now. Stay tuned for more prints. This is fun!

🙋

Thanks for visiting.