Wednesday, April 2, 2014

Spring in Colonial Williamsburg, Part I

Is spring really, finally here to stay? I certainly hope so. I am ready for it. Winter seems to have had a hold on everyone this year, but I think spring is starting to take over. I love seeing the tiny blooms peaking out of my twisted willows and Japanese maples.

I love Colonial Williamsburg in spring. We took a walk there recently and everything is still dormant or unplanted. But, I thought I'd share some pictures from a visit last May that I meant to share at that time, but never got around to. Hopefully this will get you in the springtime mood.

(all photos taken with a canon powershot 870 IS and edited in google+)

red buckeye tree at Colonial Williamsburg via foobella.blogspot.com
Red Buckeye
When we walked over to the "colonial garden" area on Duke of Gloucester Street we looked around to see if we could find the name of this tree above.

Colonial Williamsburg gardens  red buckeye via foobella.blogspot.com
red buckeye

We're pretty sure this is it judging from it's label (above).


Colonial Williamsburg gardens via foobella.blogspot.com

I love walking through all the gardens here. You can go from one manicured yard to the next down brick walkways and through little garden gates.

Colonial Williamsburg gardens via foobella.blogspot.com

brick walkway, moss, flowers Colonial Williamsburg via foobella.blogspot.com

Colonial Williamsburg gardens via foobella.blogspot.com


Colonial Williamsburg Gardens via foobella.blogspot.com

Colonial Williamsburg Gardens via foobella.blogspot.com


Colonial Williamsburg gardens via foobella.blogspot.com


Colonial Williamsburg gardens via foobella.blogspot.com

If you've never been to, or even heard of, Colonial Williamsburg, it used to be the capital of Virginia during colonial times. Basically, it's a living museum with ..... let me just copy and paste from wiki. So much easier:

Colonial Williamsburg is a living-history museum and private foundation representing the historic district of the city of Williamsburg, Virginia, USA. The 301-acre (122 ha) Historic Area includes buildings dating from 1699 to 1780 (during which the city was the capital of Colonial Virginia), as well as Colonial Revival and more recent reconstructions. The Historic Area is an interpretation of a Colonial American city, with exhibits including dozens of authentic or re-created buildings related to colonial and American Revolutionary War history. -- read more at Colonial Williamsburg's Wikipedia page.
You need a ticket to get into many of the buildings, as it is a museum with costumed interpreters, but you can walk the streets, drink/eat in the taverns, enter many of the shops, and enjoy some of the gardens for free. If you haven't visited, I highly recommend it. It's a beautiful place.

I feel like I've visited it more in the past few years than I have my entire life, even though I've always lived within 30 minutes of it.

Colonial Williamsburg gardens via foobella.blogspot.com

Colonial Williamsburg gardens via foobella.blogspot.com

Colonial Williamsburg gardens via foobella.blogspot.com

Colonial Williamsburg gardens via foobella.blogspot.com

This is just kind of a tiny peek inside this living museum. Tomorrow I will show you some of it's more recognizable buildings and a bit of the colonial garden shop. More flowers!

Friday, March 21, 2014

Women's Circle Traveling Journal

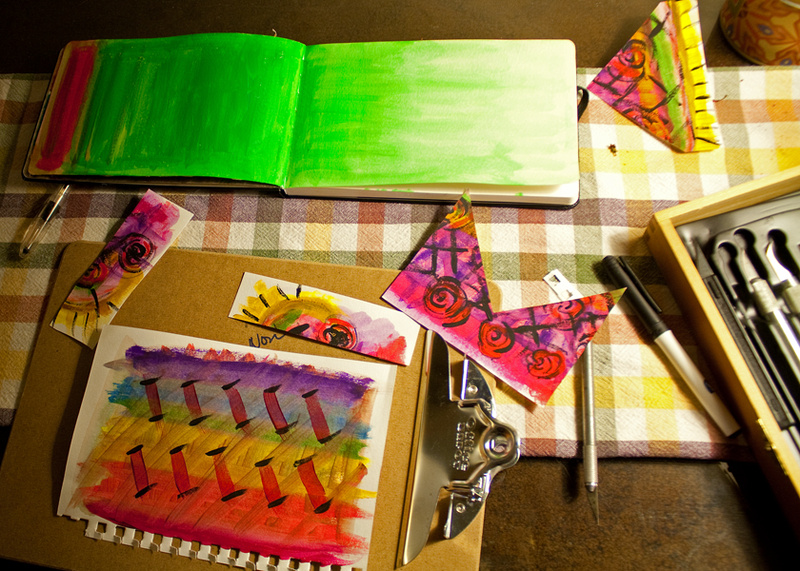
I follow this wonderful blog called Introverted Art, and when Ana mentioned she wanted to start a Women's Circle Traveling Journal, I just jumped on it without thinking. I've been wanting to break out my paints and do something creative, so I felt this was the perfect opportunity, especially since there were no rules. Anything goes. 

Once I received the traveling art journal, I had one week with it before I had to send it on to the next participant in the group. I was so stumped for ideas at first. I sketched a few things (in a lovely sketchbook my sister gave me a few Christmases ago). Then, I just decided to take the paints out, dip my brush in, and just paint. I just grabbed some color and started painting with no idea where it would lead. 

I always hear people say that all the time about art journaling. Don't think about. Just do it. Well, I didn't know how amazing it would be until I actually took that advice. I now know why people love doing them. It was so darn fun and relaxing, and it really does feel like a release of pent-up creativity.  

art journal painting via foobella.blogspot.com

I painted a few pages in my sketchbook of nothing in particular, just shapes and colors. (I even got my husband to play along. Love his sunset, which he first drew on his ipad and then translated it perfectly with paint.)

art journal painting via foobella.blogspot.com

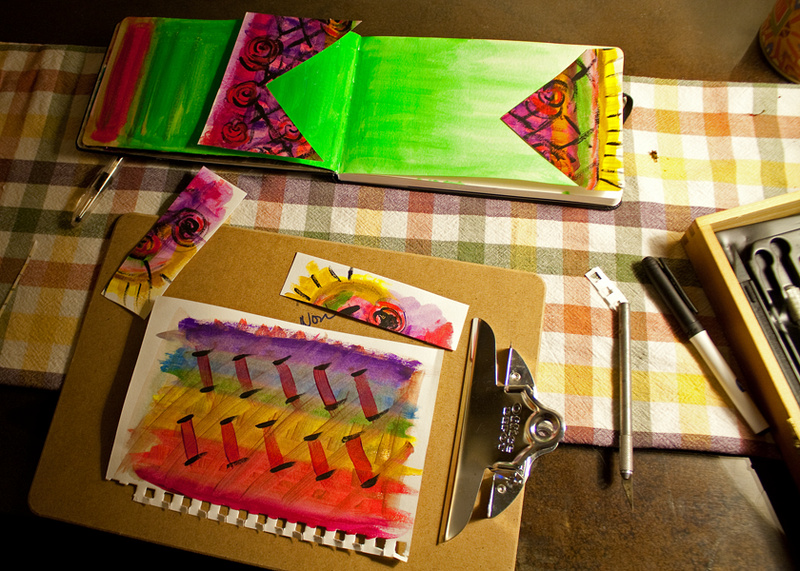
I let them dry overnight, and the next evening I opened the traveling journal and decided to take the same tact, and just start painting. I didn't go as crazy, because I wanted it to be a clear background. Then, I started cutting shapes out from one of the pages I painted the night before.

art journal painting via foobella.blogspot.com


art journal painting via foobella.blogspot.com

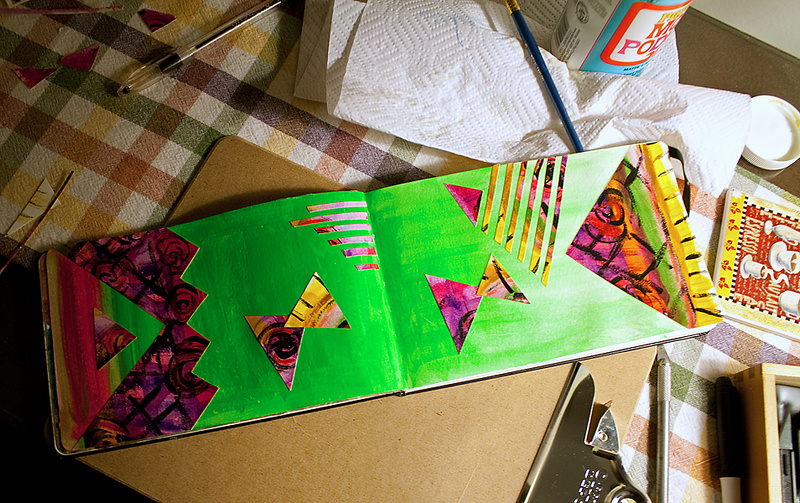
With still no plan, I just started gluing the pieces to my painted surface in the art journal. Is it just me or does it kind of remind you of the 1980's? Maybe I'm just reliving my childhood. 

art journal painting via foobella.blogspot.com


I let it dry another night and the next day I took some black paint and brushed along some of the edges of the cut out pieces just to give a little more depth to them. 

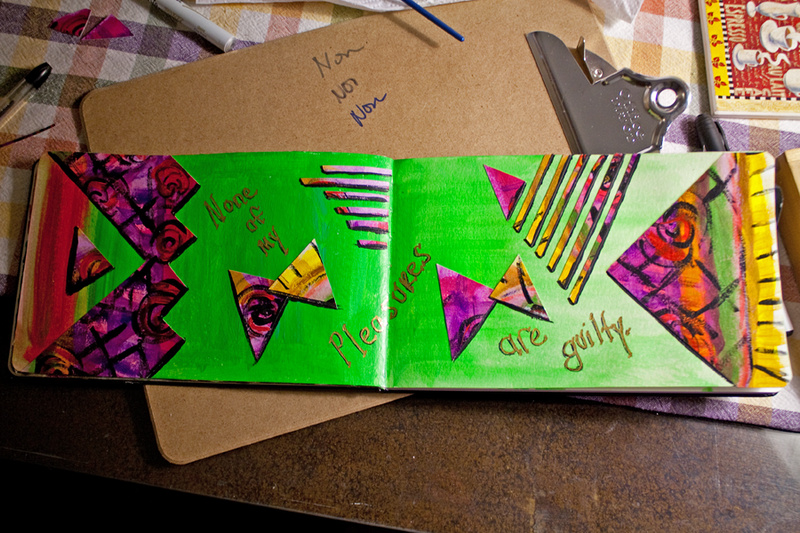
And the lettering. Oh my. This is where I really need to be more intentional; with my lettering. I love typography, so you'd think I could have done a better job. Next time I will try to be more creative with my lettering. 

art journal painting via foobella.blogspot.com

I mod-podged the entire surface to preserve it, and I let that dry overnight.

art journal painting via foobella.blogspot.com

"None of my pleasures are guilty". A quote by a non-famous person. Me. ha. It's my motto in life.

This was a great exercise and I hope to do more of this art journaling in my own sketchbook. It really was very fun, relaxing and such a creative release. 

A big "thank you" to Ana at Introverted Art for allowing me to join in this traveling art journal.

Here is a list of the other participants in this Women's Circle Traveling Art Journal:
  • Artful Fairy Tales
  • The Marmelade Gypsy
  • Goodness Recycled
  • Middle Girl
  • Ophelia's Art
  • Christina Jackson
  • Lovely Reveries
  • Kyra Wilson's Studio
  • She Who Seeks
  • Words & Blooms
  • Free Spirit Scribblings
  • A North End Journal
  • Magic Love Crow
  • Bichinhos na Cabeça
  • Art of Nadia
  • Castles Crowns Cottages
  • Thursday, February 6, 2014

    Easiest and Best Roasted Tomato Sauce

    Every Wednesday night is pasta night in our house. We've followed a few different recipes, with one of our favorites being Lidia Bastianich's very simple and tasty marinara sauce. Recently, though, my husband found another recipe for roasted tomato sauce, which has moved to the top of our list. Sorry Lidia. We still love you.

    Easiest and Best Roasted Tomato Sauce via foobella.blogspot.com

    Jason thinks he found the recipe on epicurious if that helps anyone who wants to find the original. But I am going to lay it out here for you in the way I was taught (just yesterday) to cook it, by Jason via google chat. Meaning, he was getting ready to make his way home from work yesterday and asked me to get the sauce started. So, he gave me the directions in a chat. 

    Easiest and Best Roasted Tomato Sauce via foobella.blogspot.com

    Now, I'm not a bad cook, but I'm not Jason. 1) I don't really enjoy cooking, probably because 2) I can't do more than one thing at a time in the kitchen like he can. So, we've agreed that he is the cook, and I am his helper and cleaner-upper. Though he is a great cook, he is also messy, so I'm not let off the hook that easy. 

    Easiest and Best Roasted Tomato Sauce via foobella.blogspot.com

    Jason's Roasted Tomato Sauce:

    Ingredients:
    1 35 oz can peeled plum tomatoes
    pinch of red pepper flakes to taste (some like it hot, be careful)
    6-8 crushed garlic cloves
    4 tablespoons butter (1/2 stick)
    1/2 tablespoon oregano or Italian seasoning

    9 x 13 glass casserole dish
    immersion blender, optional

    Optional variations:
    fresh or crushed basil, or basil paste
    red wine
    ground beef, seasoned to your tastes
    ground turkey, seasoned to your tastes
    Italian sausage
    peeled, uncooked shrimp

    Directions, given via gchat:

    Jason
    dump the can of tomatoes into the large glass casserole dish
    sprinkle in a good sized pinch of red pepper flakes

    me
    oh no. do I have to blend them?
        (I don't get along well with immersion blenders.)

    Jason
    no

    me
    whew

    Jason
    just use a fork to kinda cut/lightly mash them after you dump them in
     (I actually used an old potato masher to just squish them up a bit.)

    me
    k

    Jason
    crush 6-8 cloves of garlic...no need to chop them
    put them in w/ the tomatoes and pepper flakes

    distribute 1/2 stick of butter w/ the tomatoes
    give a sprinkle of the Italian seasoning
    cook at 375º until I take it out and mix w/ the browned ground turkey (which I will cook when I get home)

    me
    ok

    Jason
    you can give it a little stir after 30 min or so

    me
    ok

    Jason
    it's pretty easy

    Yes, I am here to tell you that it is the easiest and best tomato sauce, and the fact that it is roasted in the oven probably has a lot to do with its wonderfulness. Oh, and the butter. Though, if you don't want to use butter, I'm sure it will be just as good. 

    Additional directions:
    When Jason got home, the sauce had been cooking for about 30 minutes or more. He then took it out of the oven and used an immersion blender to break up the tomatoes a bit more. Not necessary, though. You can have them as chunky or as blended as you like. He then added about a tablespoon of basil paste to the sauce. He browned some ground turkey and then deglazed that pan with red wine and added the sauce to the pan. 

    We also change it up each week by using ground beef, ground turkey, shrimp, or my favorite, Italian Sausage. If you use shrimp you will put the peeled, uncooked shrimp in the sauce about 4 minutes before your pasta is done. Or, you don't have to use meat at all. It's a great marinara sauce as well. 

    Cooking the pasta:

    A very important step we learned from watching the amazing chef, JacquesPépin, is to cook your pasta in salted water until al dente and not to drain it. Rather, scoop the pasta out of the water and into the sauce to let it finish cooking for a couple minutes. If needed, you can scoop a bit of the salted pasta water into the sauce. 

    Let's Eat! Doodle via foobella.blogspot.com

    Enjoy!

    Wednesday, January 1, 2014

    Happy New Year 2014

    Happy New Year to you. I never make resolutions anymore, but sometimes in the back of my mind I might. I am kind of more laid back in my approach to the coming years. I just want to be happy and healthy, and for my family and friends to be happy and healthy. 
    I'm pretty easy to please in that regard. 

    Ok, that's not all true. I'd like to craft more, clean more, garden more, and lose a ton of weight.
    There. We'll see how it goes. 

    I hope everyone has a happy and healthy 2014, and that we can all stick to our resolutions. 
    Happy New Year 2014 via foobella.blogspot.com
    made with paper by 53

    Tuesday, December 24, 2013

    Christmas Delights 2013

    Here is a little Christmas cheer that is going on around our house. 

    Christmas Tree via foobella.blogspot.com

    Gingerbread house via foobella.blogspot.com

    Jason decorated Gingerbread house. I approved. =)

    Christmas Tree via foobella.blogspot.com

    Christmas  via foobella.blogspot.com

    I spy a little village peeking in the mirror.

    Dickens Christmas Village via foobella.blogspot.com

    This year's Dickens Christmas Village setup. 
    Jason made a starry night sky background that I am in love with. 

    Dickens Christmas Village via foobella.blogspot.com

    Dickens Christmas Village via foobella.blogspot.com


    Vintage Christmas Santa via foobella.blogspot.com

    I love our tree, but I felt like something was missing. Something from my childhood.

    Vintage Christmas Santa via foobella.blogspot.com

    Then it hit me. Tinsel! I love tinsel. 

    Christmas Tree via foobella.blogspot.com


    Tinsel. Everywhere. 
    I know I'm probably in the minority these days on the tinsel, but then I also love the big old fashioned colored lights on my tree, too. 

    Christmas Tree via foobella.blogspot.com

    Christmas hanky via foobella.blogspot.com

    A sweet little Christmas handkerchief my sister included in her homemade Christmas card. 

    Gingerbread house and Poinsettias via foobella.blogspot.com

    I love poinsettias, and Jason found some at Lowe's last week for 0.62 cent a piece. 

    Poinsettias via foobella.blogspot.com

    Christmas presents via foobella.blogspot.com


    pumpkin pie via foobella.blogspot.com

    There is nothing better than the smell of pumpkin pie. 

    Christmas baking via foobella.blogspot.com

    I don't even mind the cleanup. As long as Jason is doing the baking. =)

    Christmas tree via foobella.blogspot.com

    Christmas tree via foobella.blogspot.com


    I hope everyone has a wonderful and peaceful Christmas this year. 

    For those going through hard times, be it health, family, money; I pray for better times for you and yours. 

    Tuesday, December 3, 2013

    Brushed Nickel Knobs On My Newly Painted Laminate Cabinets

    *


    I hope you had a nice Thanksgiving. Ours was full of great food and wonderful family and friends. 

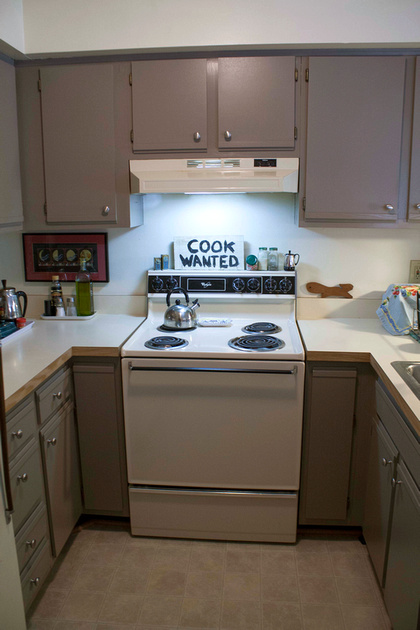
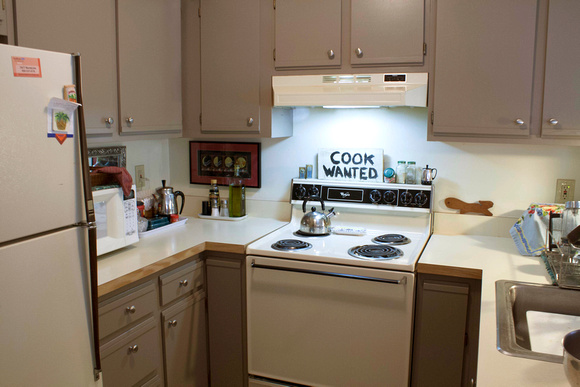
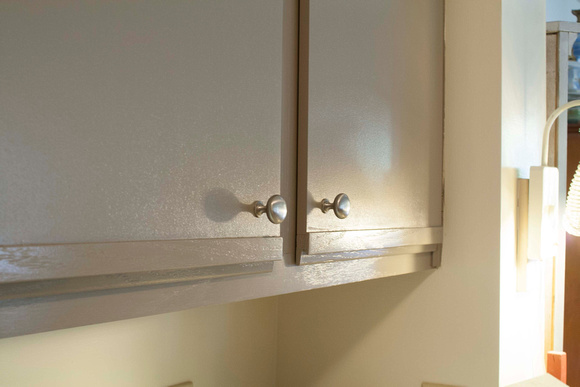
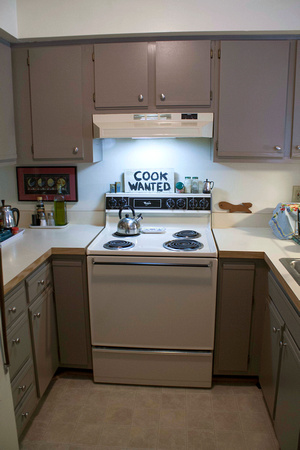
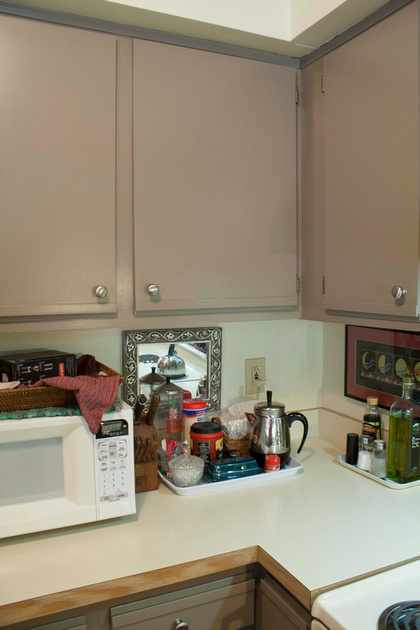
    Today I wanted to show you my painted laminate cabinets with their finishing touches, the brushed nickel knobs. And, wow, what a difference this makes. 
    (Read more info on the easiest painting process here.)

    painted laminate cabinets with brushed nickel knobs via foobella.blogspot.com

    painted laminate cabinets with brushed nickel knobs via foobella.blogspot.com

    I thought the cabinets looked great before, but this just brings everything up a level and really makes the kitchen look complete. Unfortunately, I could not put knobs on the two doors on either side of the stove because they need to open completely to allow the small drawers inside to be pulled out. 
    It really bothers me, but it is what it is. 

    painted laminate cabinets with brushed nickel knobs via foobella.blogspot.com

    painted laminate cabinets with brushed nickel knobs via foobella.blogspot.com


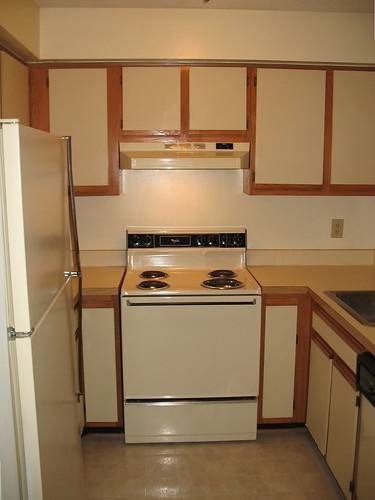
    Kitchen before and after. 

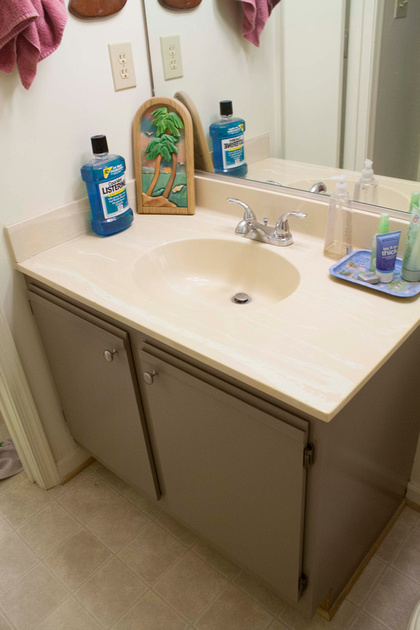
    bathroom laminate cabinets painted via foobella.blogspot.com

    We also painted both bathrooms with the same color as the kitchen (Eiffel Tower by Olympic) and installed the same brushed nickel knobs.

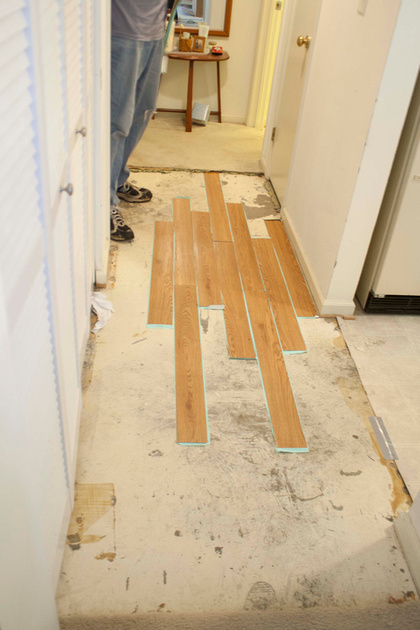
    peel and stick flooring redo via foobella.blogspot.com

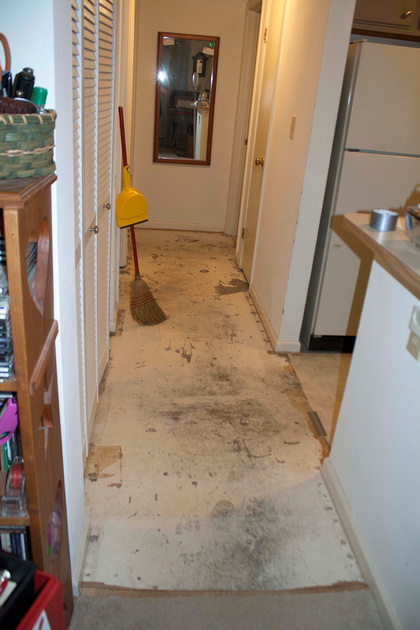
    And here is our next project. The hall floor. If you've followed me long enough you might remember a little incident with my water heater going kaput and water everywhere. 

    hallway redo via foobella.blogspot.com

    Of course, I learned after the fact, from my brother-in-law, that I really didn't need to pull up the carpet, and that it would have dried out just fine, but I'm glad I did anyway. This will be a nice little update to the condo.