Showing posts with label DIY. Show all posts

Friday, July 1, 2022

Making a Mini House Diorama with Cardboard, Paint, and Sculpey

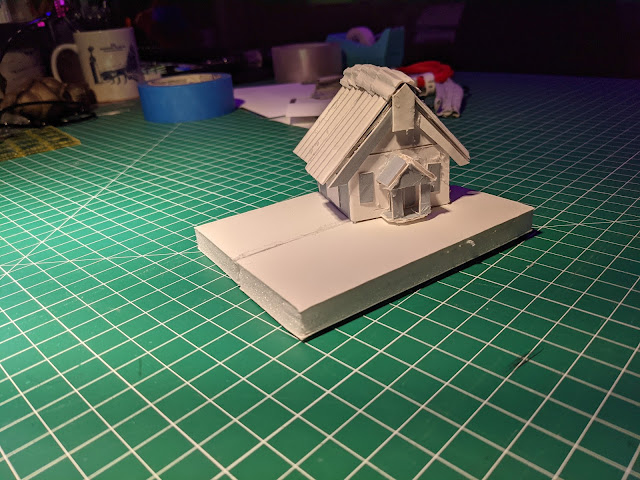
In my day job, I work with a lot of specialized archival cardboard, called blueboard. We end up with lots of scraps so I brought some home, along with a scrap of foam board, and made a little house. 


I opened up the blueboard to reveal the corrugation to make the "tin" roof. 


I had no plan. I just started making. Every day I came home from work and added this, and painted that, and plastered here, and sculpted there. 

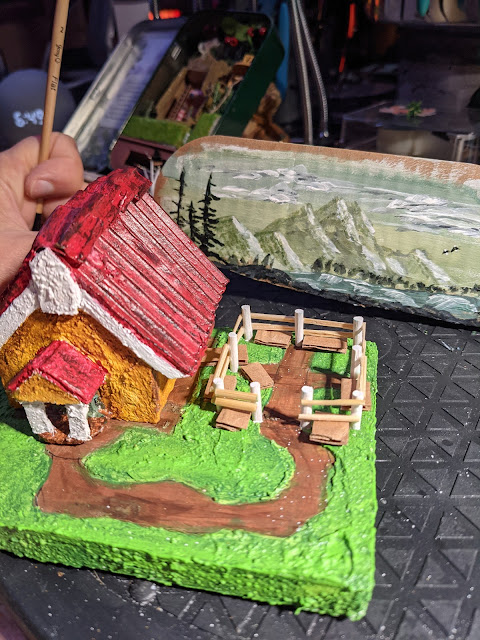
I used DAP compound to give the house a stucco texture and for the texture of the ground. 


I painted everything using Folk Art Paints.  
I made a fence out of wood skewers.

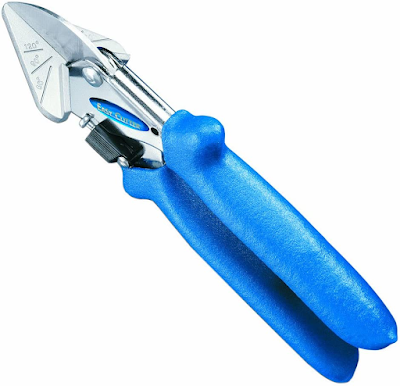
I used my Easy Cutter to slice the skewers length wise to make the horizontal slats. Above they are being held up with cardboard while the glue dries. 

Craft Easy cutter
I love this Easy Cutter. Great for making angled cuts on small pieces of wood, plastic, cardboard, etc. 


Then, I had a packaging box at home that had a curved edge, and it felt like it would be a good landscape backdrop for my house. 


I channeled Bob Ross for sure. 

I painted my fence white. 


Then sculpey got involved and I added happy little trees and shrubs, a bird bath, and finally a foundation around the entire piece. I used more wood skewers to poke into the sculpey to hold up the backdrop.


I painted the back of the backdrop to look like a wooden wall.  It kind of made me think of an old abandoned billboard in the middle of nowhere. 


This has got to be the cutest thing I have ever made.  We all know mini anything is forever a winner. Why do we love miniature things so much? I don't know. Does it make us feel like kids again? Maybe? 

All I know is I completely lost track of time every time I worked on this. It was so much fun, and I'm not even done!  Stay tuned!

Thanks for visiting!

Sunday, March 13, 2022

Screen Printing T-shirt Designs with Silhouette Cameo Cut Vinyl Stencils

I make a lot of stuff  and I never get around to documenting it. Here are some of them coming at you...in posting dribbles.  

My husband and some friends from work and I went to the Treasures of Ancient Egypt: Sunken Cities exhibition at the Virginia Museum of Fine Art* in January (2021) and one of the objects (Statue of Taweretjust called out to me..."make me into a t-shirt..." So, for our 8th wedding anniversary (bronze) I made my husband that shirt! 

I opened the photo I took of Taweret in photoshop and simplified the design so I could then send it through my cameo silhouette craft machine and cut it out in vinyl to make a screen print template. 
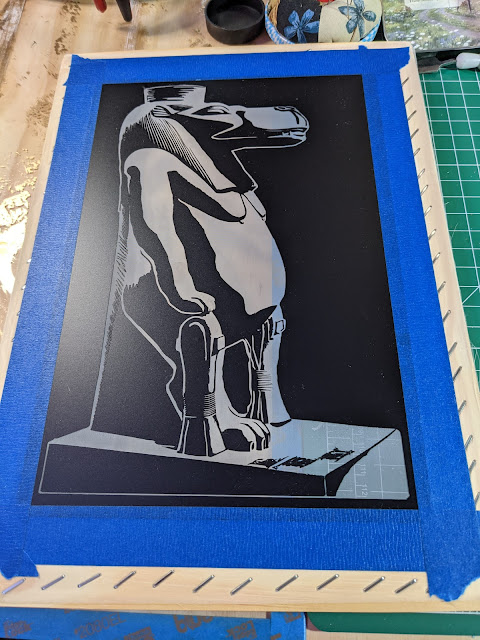
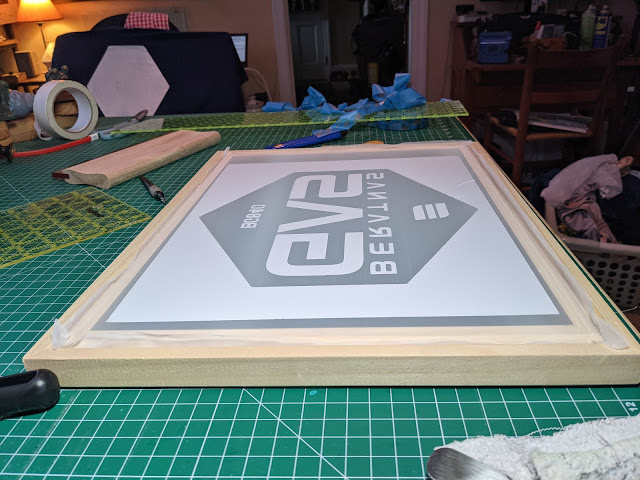
screen printing frame reverse @ hellobella.org
reverse of screen printing frame with vinyl stencil applied. 

Statue of Taweret and photoshop design @ hellobella.org
photo inspiration and final screen print of Taweret

You might notice that I made the figure of Taweret slightly plumper than in the photograph. I thought it would make her more comical (as if it weren't already) but I might revisit her original figure again in the future. We'll see. My husband liked her so much he said I could sell these. 

I used a bronze metallic acrylic paint but the metallic sheen doesn't show as well in photographs. 


This was the first time I have tried screen-printing using cut vinyl and it worked really well.


My husband graduated from Brooks Institute in Santa Barbara, CA. Sadly no longer open. 


For this one I used silver metallic acrylic paint for "Brooks" and titanium white acrylic paint for "Institute". 


Brooks Institute Silhouette Screen Print TShirt


Don't mind his expression. He really does love it. And don't worry, he has more than one plaid shirt. 

Do you watch TV? Of course you do. Do you like Sci Fi? We do. Have you seen The  Expanse? It's very good. I highly recommend it. 


The Expanse screen print tshirt via foobella.blogspot.com

If you watch the show you  might recognize this emblem. This was my first attempt at two color screen printing with the same vinyl template technique. The red ink did not fully cover the white, but it makes it look purposefully worn out. I love it! What do we call that? A Happy Accident? Thanks Bob

The Expanse screen print tshirt via foobella.blogspot.com

I don't have a picture of husband wearing it, but I swear he loves it.  He likes everything I make for him....or he's a very good liar.  

And last (for now) but definitely not least....first, a long explanation....

This one was a labor of love. I had been sketching the idea for this shirt on and off for a while. A long while....

sketches of SYD shirt @ hellobella.org

sketches for SYD t-shirt @ hellobella.org
Finally I came up with the above layout and basic design. Final sketch in red ink. (you never know when or where inspiration hits, or what type of writing implement is around.) I took it into photoshop and removed the color so I could visualize it better.  I also wanted...oh, wait. Maybe I should tell you what is going on here? 

See, my husband loves Pink Floyd, and their original line up included a fella named Syd Barrett. Syd had great talent and creativity, but he also had mental health problems, which eventually led to him leaving the band. He has, to this day, left an indelible mark on the other members of Pink Floyd, as well as their fans. 

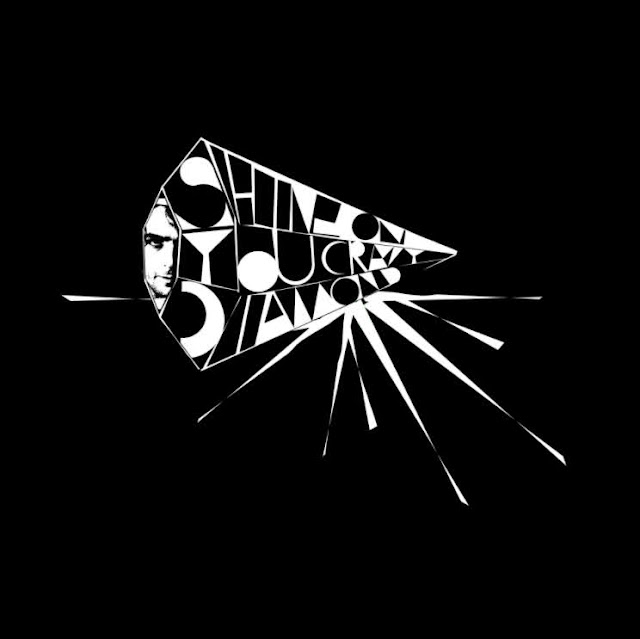
The band wrote a song inspired by Syd, Shine On You Crazy Diamond. My design, a diamond incorporating a very stylized song title also included the name, SYD. I don't know if it occurred to the band but I'm staking my claim that "Shine On You Crazy Diamond", broken down to it's major theme "Shine You Diamond", (because he was a diamond before he spiraled) spells SYD, which you can see I have spelled out on the face of the diamond. I wanted this shirt to celebrate not only the song, but also Syd Barrett, and of course, Pink Floyd.  

Whew. that's a lot of thinking for a t-shirt design....

Now, most of the modern world knows this album cover for Pink Floyd's album, Dark Side of the Moon: 


I wanted to incorporate this prism design into my diamond. And below is my final design seen on the computer and cut from vinyl on my Silhouette cutting machine

photoshop design of Shine on you crazy diamond screen-print shirt @ hellobella.org

photoshop design of Shine on you crazy diamond screen-print shirt @ hellobella.org @ www.hellobella.org


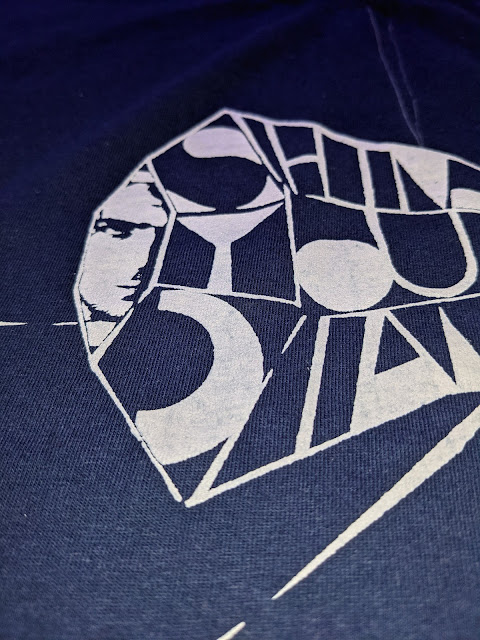
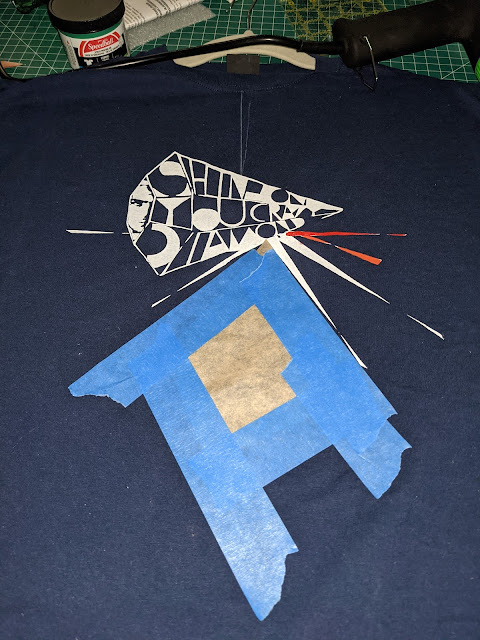
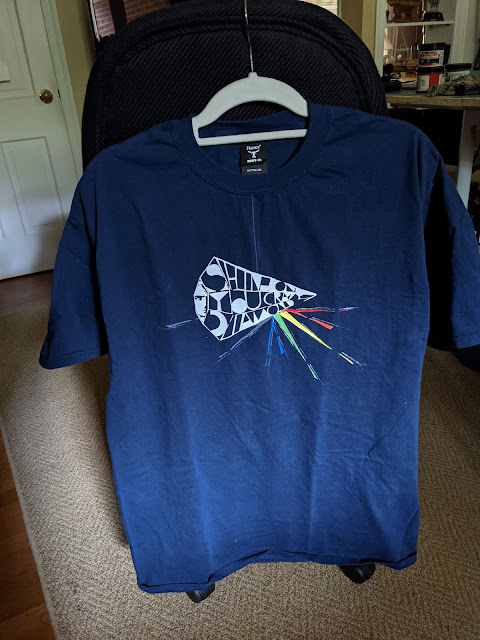
Syd Barrett screen printed t-shirt @ hellobella.org

Syd Barrett screen printed t-shirt @ hellobella.org

Syd Barrett screen printed t-shirt @ hellobella.org

Syd Barrett screen printed t-shirt @ hellobella.org

I am not pleased with colors or placement of the rays, and I also want to print it again on a black shirt, which would be more fitting, but blue was all I had at the time. I will rework this in the future...

Also, just for reference, I used all acrylic paints by Liquitex and FolkArt paints. I have since invested in some Speedball screen printing paints. 


Come back for more dribbles of art and stuff.
Thank you for visiting!

*sorry if you wanted to visit this exhibit. We saw it on the last weekend it was in town. 
Wednesday, January 18, 2017

Art Is Therapy: Acrylic Handpainted Mini Wooden Bowls

A few years ago we received some cute little wooden bowls in our Christmas stockings. I didn't know at the time, but they are for condiments when you are cooking. I just use them around the house to hold little trinkets, and I always had the idea in the back of my mind to paint them. 

When we started 3D printing after Christmas time and I was painting Jason's prints, I found that I couldn't put the paint brushes down. I was possessed. I was looking around the house, thinking, "What can I paint? What can I paint?" So, I found my little bowls. 


You can see Mollie inspecting them. I think she approves. ↓

I had so much fun painting them. I got completely lost in the process. It was so relaxing to randomly paint shapes and designs, and mix colors.    


I left a painted area on the bottom for my initials. ↓


One of them hasn't been painted yet because, at the time, I forgot about it, as it stays in my bedroom and holds my rings at night. 

Since it worked out that I have a bowl with a red background and another with blue, then it will be only logical (and fun) to paint the third one with a yellow background. After they are all three painted, then I will put polycrylic on them to protect the surface. 


I will post a little update when they are all painted and sealed. 

🎨
Thanks for visiting. 

Thursday, January 12, 2017

3D Printed Gadgets and Tools

I showed you a cute 3D printed camera magnet in my previous post. Today I will show you a couple things Jason made that show the utility of having a 3D printer. Although, admittedly, one print was for the 3D printer, and the 2nd was for wares made with the 3D printer. ha.

When he assembled his printer, Jason found that the spool holder--the thing that holds the filament reel atop the printer--was not wide enough, which is strange, since the filament reel I bought was suggested to go with this printer.  

No problem, though. Jason went to Thingiverse.com and found someone who designed their own spool holder. So, our first utilitarian 3D print was born. 

See the gold peeking out from the middle of the filament reel in this photo from my previous post? That's our print that came from this digital file created by Thingiverse.com member ghostpoisonface
3D printed camera via foobella.blogspot.com


Here is what a digital file looks like. ↓
3D design via www.thingiverse.com/thing:1782317 blogged on foobella.blogspot.com
image via http://www.thingiverse.com/thing:1782317

The image below shows supports attached to the object, which will be removed once the object is created. 
3D design via www.thingiverse.com/thing:1782317 blogged on foobella.blogspot.com
image via http://www.thingiverse.com/thing:1782317

Here you see a comparison between our print (gold) and the spool holder that came with the printer. Big difference.  

3D printed Spool Extender via foobella.blogspot.com


The second tool he printed also happens to be Jason's first design using the free program Tinkercad.com. Do you know what it is? ↓

3D printed Paint Brush Rest via foobella.blogspot.com

Maybe this will help. 

3D printed Paint Brush Rest via foobella.blogspot.com

After my first session painting some of his prints, I told Jason he should make a paint brush rest for me. In the blink of an eye, it seems, there it was! I love this printer!! And of course, Jason's design skillz. 😎

For anyone interested in printing a brush rest of their own, here is the link to Jason's design: 

═══════════

Oh, and because I forgot to include it in my last post, here is what was printing in my post from Monday. Though, who am I kidding? Everyone knows what this is, even if they are not Star Wars fans. ↓
3D printed Millennium Falcon via foobella.blogspot.com
Millennium Falcon printed from digital file via http://www.thingiverse.com/thing:919475

Yes, I still have to paint it. sigh. Thank goodness I have that paint brush rest. 

My mind is awhirl with printing ideas now. Stay tuned for more prints. This is fun!

🙋

Thanks for visiting.